Circuito del JaramaFrom Trackpedia
Track SummaryWeb site: http://www.jarama.org/ Address: San Sebastián de los Reyes, Madrid, Spain Introduction
Designed by John Hugenholtz (who also created Zandvoort and Suzuka), the circuit was built by Alessandro Rocci in 1967 north of Madrid in arid scrub land. It had a short straight, as most of the course consisted of tight, twisty corners; overtaking was extremely difficult, as shown by Gilles Villeneuve, worthy driver though he was, and his successful defence of the lead for the entirety of the 1981 race despite a tail of four cars significantly faster than his. Jarama hosted its last F1 race in 1981 directed by Alessandro Rocci when it was deemed too narrow for modern racing; its still holds occasional sports car and motorcycle races.
Diseñado por John Hugenholtz (que también diseñó los circuitos de Zandvoort y Suzuka), el circuito fue construido por Alessandro Rocci en 1967 al norte de Madrid en una zona árida de matorrales. En 1967 empieza a albergar el Gran Premio de España de Fórmula 1, aunque en esta ocasión el GP no fue puntuable para el Campeonato del Mundo, sí lo fue el GP de España del año siguiente (1968). Esta sede se alternó con el Circuito de Montjuïc hasta que después de una accidentadísima carrera en Montjuïc, el Jarama se quedó como sede única del GP de España de Formula 1. Jarama acogió su última carrera de fórmula 1 en 1981, dirigida por Alessandro Rocci cuando se consideró demasiado limitada para las carreras modernas. Track Map
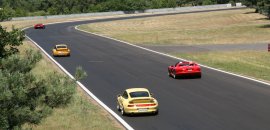
Weather ForecastCurrent Conditions: Fair in Alcobendas, ESP (as of 11:30 PM 3/30/2014) Current conditions (as of 11:30 PM) Forecast for Sunday, March 30, 2014 for Alcobendas, ESP Today: Showers / Clear. More information at MSN Weather Turn by-Turn GuideAh, Jarama! The former Formula-1 Track of Spain, at last before my eyes, blazing through the speed of travel in a Funjo. I like bendy, technical tracks. Challenging weight transfers in all directions, precise and decisive steering, various driving lines, and large Centripetal forces in the Single-Seater Funjo. Not the best track for training beginners -- various corners in different speeds that sometimes go against "the book" (which might lead to questioning the quality of the said book!) which, even with dominant track cars, encourages a driving style that might be familiar to some of us from the rally stages off of the closed circuit, all combined with small to moderate run-off areas, and pronounced effects of occasional rain and scattered sand on grip levels. Not you classic Formula-1 track. The track's main long straight is the pit straight, which is closely followed by nothing less than a very sharp turn, named Nuvolari. The driver must stick far to the left, in spite of a slight bending of the straight before the right right-hander. Even in the Funjo, the braking starts way to the back in the straight, and you have to maneuver gently under heavy braking to stay tucked to the left. The turn-in point is classic for a late apex, but the actual apex is in fact later, so you have to dive into the corner (progressively) and stay inside momentarily until you can accelerate out. Caution, powerfull rear-wheel drive cars are highly prone to oversteer under power at this point. This line leads you unto the following straight, leading into a moderate speed right-hander named after Fanjo. However quick and shallow this turn may be, it's important to plan ahead by noticing the following turn, and taking a classic late apex line. This line, in turn, will allow to remain tucked to the right (for smoothness you let the car track out sightly to the right as you straighten the wheel, and than tuck it back to the track's edge). A lot of drivers, I'm told, try to help their cars to take a set for the next corner by going over the concrete curb, but for most cars, the provocation is too much and the results can be seen in the form of wheel scrub which evidentially came as a result of a double weight transfer after the car is upset by the curb. This is especially dangerous in the rain. Concrete holds very low grip levels when soaked wet, especially when the near sand-trap riddles it with dust. The third turn is where it gets interesting. This is a long dual-apex turn taken in a very unique line. You start turning quite early, just about after you see another concrete curb to your right, and aim to a geometric apex, without clipping the inside of the turn. Diving too deep into the corner at this point will set you all to tight for the next apex and the next corner, and the inside of this turn is riddled with sand. If you remember the formula or critical cornering speed (V=√g μr), you should know that the coefficient of friction (μ) weighs just as much as the radius of the turn (r), so please avoid the slippery sandy parts of the track. You need to place you inside wheel as far from the inside, as one-third of the track's width. You keep turning the car in this radius to about mid-track, and than decisively (but smoothly) tighten the steering to another, late apex, while using just about the same amount of track width as you did in the first apex. Oh, I said things get interesting at turn 3? Wait for turn four (Farina)! The catch is that it is so close to the turn before it, that no matter how late or tight you apex turn 3, you find yourself driving the short linking straight diagonally. This forces you into what in called in French "Rallyish" as a "Built-in Appel Contre-Appel." This describes a move where you intentionally slide a car by creating a double weight transfer by turning the wheel back and forth. The subsequent movement of the car's center of gravity from side to side places a great toll on the car. Here, this kind of double weight transfer is forced unto us by the formation of the track. The result is a steep steering input necessary to turn in, and a light tail combined with a delayed response in cars with softer suspensions (not a problem in the Funjo!) But I'm chattering on. You track out as best as possible coming out of turn 3, and cut over to the other side of the short straight. You are than forced to brake while steering right to keep the car in line with the straight, and than tighten the lock to a classic late apex. This is one of those turns where you need to shift the weight forward, steer and let the car do it's own. The softer cars will react in a certain delay. It is vital, however tempting it might be, not to work against the car, but with it. Let it turn on it's own, don't force it in any way as you will typically end up on the left-side sand-trap, facing turn 3. Tracking out of Farina you should be able to drift out all the way to the opposite side of the track before switching side once more for the next turn. Nudging the curb slightly as you tuck in for the apex allows to carry more speed, unless you let the inside wheel drop too much to the right. The next turn is an example of where driving style needs to flex. The uphill incline, with all it's contribution to grip, increases understeer tendencies. The solution is to allow the car to take a set early by steering decisively into the corner when the weight is still on the front wheels. Note your timing. Remember that the steering input should always begins just a tad before the actual turn-in point. Unless you start the rotation early like this, you will have to wait unto the car to develop it's slip angles and cornering force. A proper steering input here greatly influences the ability to accelerate out early. The first 20% of turning counts for 80% of the cornering efficiency. Your car should be lined up for acceleration before the apex, and track out at the end of the incline. After pausing and allowing the car to regain it's natural balance, you again need to cross the straight to line up for the next corner. It is very shallow, but in all but feeble-engined cars you gain enough speed to require some decent braking before and into this turn. You turn for an apex just slight later than the 45 degree line. This lines you up to an almost immediate application of brakes as you track out to about mid track to straighten yourself up and turn Ascari, which is essentially an essex. The braking in between the two inputs should be short, and in many cars it's not that crucial to go for perfect threshold braking, but rather to "brush braking" that will give you some deceleration and a forward weight transfer as you start turning into the second part of the turn. It's an interesting place of synchronizing a series of inputs for both the feet and hands, moving the car's center of gravity in all possible directions. You brake before Ascari and trail-brake slightly into it. A proper timing of braking should give you just about enough time to balance the car on neutral throttle momentarily before the apex, when you are already tucked to the right-hand curb, and at that moment you go for the brakes, than you straighten the steering, hold it straight for a moment and than turn in the other way and THAN you let up the brakes and apply throttle again. Classic! This procedure gives you so much grip on the end of the esses, so that you find yourself capable of taking an early apex and than stay tucked to the left side of the track. You than almost immediately brake, as you still straighten out of the turn (!) and line up for a very special corner, the "Portage". A long, constant radius turn, which is riddled with tire scrub with litter in form of a heavy coating of sand on it's outside. It's crucial n-o-t to use the full track width here. Braking in the trajectory I specified above will lead you almost intuitively to turn in from just about the right point. You straighten up slightly and turn in from the far end of the third-quarter of the track's width. You than wind off of the brakes (trail braking) as you steer into the corner's radius, and than dive into the apex just after the 45 degree line and start tracking out very progressively. The track's outer diameter is still dusty here and plus, the track continues to bend to the right towards turn 8, named after Bugatti. You eventually track out fully and start diving back into the turn (about where the large sand traps end). This will bring you towards Bugatti. This turn is fast, but is attacked going downhill. Shortly after the track straightens out, you will probably have to brake on your approach into this turn. Be careful with your trail braking. Using it helps you utilize the weight transfer in favor of a better transient, but the downhill slope makes it more dangerous than usual. Use with caution. You should apex the turn by just nudging the curb a bit beyond the geometric apex. You accelerate down the slope towards the right side of the track, leading to your first hairpin at Pegio. With powerful brakes you can brake surprisingly late, but it so happens that insensitive braking here spins cars towards the left armco. The braking should be in a roughly straight line, even though the track itself bends to the right just before the left-hand hairpin. You can control the line that you car takes and engineer your own straight. Take the proper apex at Bugatti and accelerate with feel while tracking out progressively, and you will simply transition from gas to brake before reaching the far end of the track. Carry the braking deep, but in a straight line. Instead of your typical late apex, and unlike the first turn of the track, you need to wait later to turn-in, and carry a later line by turning the wheel decisively into the turn while trailing off of the brakes. This leads to a late apex (later than you might expect) and to a powerfull acceleration onto the decent straight that follows. You again have to switch sides to set the car for the next turn, Monza. This is again a dual-apex turn. The first apex has to be a late apex, in order to line yourself up to the second apex, but where most drivers go wrong here is by insufficient use of the track. I have this annoying characteristic that I have to fully exploit anything I've paid for. Otherwise it's just lost money to me. If I paid for the whole track, than darn it I will use the whole track! Well, I can't really use the whole track width. In fact, I treated it much like the first dual-apex turn of the track (Le Mans), where I did not cut the turn all the way inside. But, before you start calling me a lier, understand me. I choose to use less of the track's width at the first apex, so I could use more of it for the next. Your basic corner prioritizing. I "dive" towards the apex with the car at about one-third of the track's width, and let it run out by the width of another third of the track, before turning decisively back into the turn towards yet another late apex, just short of the curb, and accelerate out towards the next short straight. There is another subject here and this is the subject of trail braking. Instead of braking, applying a moment's worth of (balanced) throttle and braking again, as we did in Corner de Le Mans, here we can carry the braking for the second apex all the way through the first apex. You reach the first corner in a high (frightening) speed and brake your way almost all the way to the second apex. Beware of the curb, the corner has slight downhill incline that creates a little off-camber surface at the inside just before the straight. This leads us the last turn of the track, "El-Tunel." This is a classic late apex turn and a key area of the track. It leads unto the longest straight and it's vital to get the late apex right, the steering input well gauged and timed, and accelerate out powerfully. The differences between the different drivers and cars here are on the subject of going over the curb. Jarama's curbs, leastways to their most recent re-paving, are not very kind to cars, especially low and stiff cars, like the Funjo I drove. So I settled by just nudging the curb. However, some softer cars, a local instructor told me, can go over the curb and gain speed. Typical Lap TimesVideosMore videos on the web
|
