From Trackpedia
The rotor is the rotating surface that is being pressed against the pads inside the caliper, creating friction, turning kinetic energy into thermal energy.
Introduction to brake rotors
The brake power required to stop the vehicle is directly proportional to the vehicle weight. Thus if the weight of the vehicle is doubled, the energy of motion (converting to heat) is doubled. The effect of vehicle speed is even more serious. If the speed of the vehicle is doubled, the brake system would require four times the power to stop the vehicle, which means the brake mechanism must absorb and dissipate four times as much as heat.
The total energy resulting from the increase of vehicle weight and speed is multiplied, i.e. if both the weight and speed of a vehicle is doubled then your brake system would require to generate eight times more power or eight times more of heat to absorb and dissipate.
The amount of heat generated by brake applications usually is more than the rate that a brake mechanism can absorb and dissipate. This will result in brake temperature increase. In normal brake applications, the time interval between brake applications (brake cycles) allow the heat to cool off. However if repeated abrupt or panic stops are made within very short time intervals, the brake temperature will continue to rise. This will result in brake fade or brake failure and damage to the brake system including brake pads, brake rotors or drums, calipers, and brake fluid.
Since all the converted heat needs to be absorbed and dissipated, the rotor comes into play as the “heat sink,” – similar to a water sink. As the rotor heats up, it absorbs heat just like a water sink holds water from a faucet. If the water pours into the sink at a rate faster than drain can handle, the water will overflow. Likewise, if the temperature of the rotor increases at a rate faster than the rotor can cool down, consequent damages are likely to occur. In one case, you end up with a wet floor, and in the other, a damaged brake system. In some extreme cases with too much heat, the tires could be set on fire.
Now we know how important a brake rotor is to a brake system. We need a bigger heat “sink” and efficient heat "draining" system to prevent heat from overflowing.
Increasing the holding (thermal) capacity means enlarging “sink” size, but in brake rotor instance this may be impractical, as it would also increase the rotating mass, which slows down the acceleration and as deceleration. This is not a desirable solution. So the challenge is to produce a rotor with the same mass, yet can manage or hold the same amount of heat longer, without overflow. To achieve this goal there are two main issues to overcome:
1. A better material that is more resistant to higher temperature with good thermal stability
2. Improved designs that can dissipate the heat faster
Rotors are usually made of gray iron due to its superior heat handling and damping (vibration absorption) character. SAE specified J431 G3000 for the automotive brake rotor and drum which has a Brinell hardness of 187-241, and a minimum tensile strength of 30,000 psi with pearlitic microstructure. A casting that meets both physical property and chemical composition requirements can still fail prematurely in brake applications due to inferior microstructure. Microstructure is the most important criteria in dictating the rotor performance under extreme heat. Microstructure is the matrix of the cast iron which is visible only under microscope (100X). The subtle difference between the “water” and “heat” sink (rotor) is that the water sink capacity is straight on volume but the rotor heat handling capacity also related greatly to microstructure. Microstructure analysis involves examining the graphite distribution and matrix structure of the cast iron.
his matrix should be predominantly pearlite, with not more than 5% ferrite and less than 1% cementite. With very few exceptions, OEM (Original Equipment Manufacturer) rotors that come with the car or replacement rotors from car dealers usually meet these standards. There are companies that make aftermarket replacement rotors. Replacement rotors are also referred to as stock rotors, because they have the same dimensions as OE rotors and do not have any drilling or slotting modification. Unfortunately, the quality from these aftermarket suppliers is rather inconsistent. Almost every manufacturer claims to meet or exceed OE specs, but in reality, very few actually live up to their claims. Their rotors are usually inferior to OE rotors. Even in the performance market, if you can find a rotor that is made to OE standards, consider yourself lucky.
As we know, these so-called manufacturers usually just fabricate (drill and/or slot) from aftermarket “stock” rotors to make their rotors have the “performance” look. The majority of consumers buy these “performance” rotors because of their look and the way they were marketed, without knowing that these "upgraded" products perform, in most cases, worse than their OE rotors.
As we mentioned earlier, a better-designed rotor can help to dissipate heat faster (more efficient) and therefore runs cooler, reduces the chance of heat buildup. RacingBrake makes rotors based on application need, rather than simply duplicating OE rotors, like most aftermarket suppliers do. See our list of applications where we have taken the OE straight vane design and upgraded it to our curved vane design. (Click here for full list). Creating curved vane rotors requires separate mechanical tooling for the left and the right sides. Due to this, the manufacturing costs are higher, but this design greatly improves air circulation. Some competitors claim “pillar” or “kangaroo paw” vane designs which are essentially non-directional as straight vane designs, and their claims of improved of cooling effects have yet to be proven.
Before investing in a big brake upgrade kit or individual big brake parts, there's one thing you should check. You must be certain that your current wheel size is compatible with the kit. Factory wheels often don't provide the clearance necessary for big brake upgrades.
The kit or upgraded, upsized rotor in question will usually indicate on its packaging or description the minimum wheel size. The wheel size refers to the diameter of the rim only, not the diameter of the rim and tire combined. You'll also want to be sure about other issues with each big brake part: Are the rotor and caliper compatible with anti-lock braking systems (if your car is so equipped)? Is there enough room between the caliper and the backside of the rim? If not, can you use spacers? Or, is there a better-fitting kit on the market for your vehicle?
If you're new to brake work, you may be wondering, "Can I do this myself?" The short answer is yes, with the proper tools and safety equipment. The brake installation procedure is beyond the scope of this article, but it's fairly straightforward. Be forewarned that dust from older brakes may contain asbestos, a highly toxic substance that is inhaled easily. Also, brake fluid is highly caustic to paint, so if you do it yourself, make sure to keep the brake fluid clear of the painted surfaces on your vehicle.
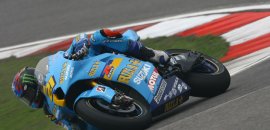
Brake rotor brake in action
Again it is very important to know and understand the manufacturer's recommendation for this step. The following is a guide that covers most manufacturers' recommendations: new rotors should be heated up very slowly and, if possible, use a set of pads that have already been exposed to racing use. For best results, break in the rotor with the same type of brake pad (compound) that you intend to use with the rotor. This will help assure that different friction materials will not build up on the rotor. After the above step has been completed, inspect the rotor-rubbing surface. A uniform polished appearance with no cracks or grooves is what you should find.
Air ducting
Heat created by brake system components can sometimes cause problems that are hard to diagnose. Many times racers blame the problem on brake pad fade. Fade is almost always caused by heat. In most cases, removing the heat from the rotor and caliper area can rid the system of fade. The important thing to remember, and what is very misunderstood is ducting should be used to force hot air away form the hot component, not blow cool air on it. By removing the heat, the component will operate cooler. For best results, force cooler air across the components making sure that the air that is being removed has a path to follow that will not allow the heat to build up someplace else. Duct size should be as big as the application will allow, and directed in the shortest and straightest route possible. It may be helpful to experiment with duct locations. On dirt cars try to install the duct in areas that don't see an excessive amount of dirt or mud, and install a fine mesh screen in the duct hose to help trap air borne dirt. On asphalt and road racecars, try to install duct on flat areas, avoiding areas that allow air to pass over the duct inlet. If the application allows, use one duct hose directed to the center of the rotor, and another directed to the caliper area, preferably directed down toward the top of the caliper; this will force hot air from the pad area. Many types of ducts are available with many applications. Be certain to match the correct duct with you application.
Rotor and brake pad temperatures
Before choosing a brake pad (compound), it is very helpful to know what temperature your system operates at. System temperature will change depending on the size of track and driving style. It is very important to factor in the change to assure your system works correctly. Most racing pads work best at certain temperatures. Running a pad that works best at very high temperatures will not give the best results if the temperature is lower than the specified range. The same is true when using a low temperature pad in a high temperature situation. Many problems can be avoided by using heat sensitive paint on rotors, pads, and calipers. This type of paint burns off when the specific temperature is reached; allowing you to pinpoint how hot the component is getting during race conditions. Tire pyrometers can not accurately tell you what temperature the components are because of the cool down time involved.
New rotor bedding-in procedure
All new iron and steel rotors should be bedded in before being used under racing conditions. Proper bedding in will prolong the rotors life and make it more resistant to thermal checking or cracking under severe braking conditions. The following procedures should always be followed when bedding in rotors:
Thoroughly inspect all brake system components before proceeding to track.
Check all bolt connections. Make sure mounting bolts and rotor bolts are properly lockwired, that brake pads are properly secured by retaining clips or cotter pins, that master cylinders and brake pedals are working properly, that brakes are properly bled with plenty of fluid, and that proper engagement of brakes occur when pedal is depressed.
Always bed-in a new rotor (disc) using a used set of pads, preferably ones which will not create heat rapidly. Generating heat too quickly will thermal shock the rotors. Likewise, when bedding-in a new set of brake pads, use a used rotor.
Make sure that the rotor surfaces are free from oils, grease, and brake fluid.
Close air ducts approximately 75% to expedite the bedding-in process.
Run vehicle up to moderate speed and make several medium deceleration stops to heat up the rotor slowly, this will help reduce the chance of thermal shock.
Accelerate vehicle to a high speed and apply the brakes bringing the racecar down to a slow speed, repeat this process until the rotors reach approximately 1000 degrees F. Do not apply brakes during acceleration.
Pull into the pits and allow the rotor to cool to ambient air temperature.
Do not hold brakes on after performing the bedding-in procedure until cooling is completed.
Do not sand rotors or pads after bedding-in. Any shutter or pulsation will most likely go away after several repeated hard stops.
Rotor runout
Rotors are blanchard ground to ensure the rotor surfaces are flat and parallel. Sometimes hubs, bearings or other components have runout that causes the rotor to runout. Allowable runout is .005 - .008. Adjust the runout by placing shims between the rotor and hub, or hat. Runout should be rechecked every week. You can assume the runout to be acceptable as long as you are not experiencing brake drag, pedal oscillation, or piston knock back.
Rotor wear
Rotors will eventually start to show signs of wear how fast depends on the type of racing, the frequency, and the brake usage. Grooving and/or cracking due to severe heat and thermal cycling indicate the rotor should be replaced. Note that surface checking itself is not a sign a rotor needs replacing as this can occur on iron rotors. Always replace rotor mounting bolts and lockwire whenever replacing rotors, taking care to inspect mounting hats or hubs for signs of abuse.
Wrapped rotors
Wrapping-up the rotors is a phenomenon that occurs when hot brakes are pressed constantly with the car at idle, thus not allowing for ventilation, eventually deforming the rotors permanently. This is the reason why race cars should be E-braked when parked between sessions.
One of the ways of further improving heat durability is to invest in drilled or slotted rotors, which allow for more ventilation.
Referenced material